Variable products allow you to set different options within the same product. The most common would be different sizes and/or colors. See the example below:
Most of the elements required for Simple Products apply, but you will add Options and Variations on the product and set price, inventory, etc. for each Variation.
Managing Variable products is a little more work than adding Simple Products, but are ideal when the same product has multiple versions of itself.
*Note: Websites like ours are monitored closely for copyright infringement. Products including licensed/trademarked characters or logos cannot be listed on the site unless you are a licensed distributor.
Creating a Variable Product
Products default to ‘Simple’. To change it to a Variable product, change the dropdown menu for Product Type as shown below:

Go to Options Tab
After you’ve switched the product to Variable, you’ll now see the Options Tab. This is where you’ll enter the options that your product has (size, color, design, etc). You’ll click “Add Option” and then add the title/values for that option (Ex. Size with Values S, M, L, XL, 2XL).
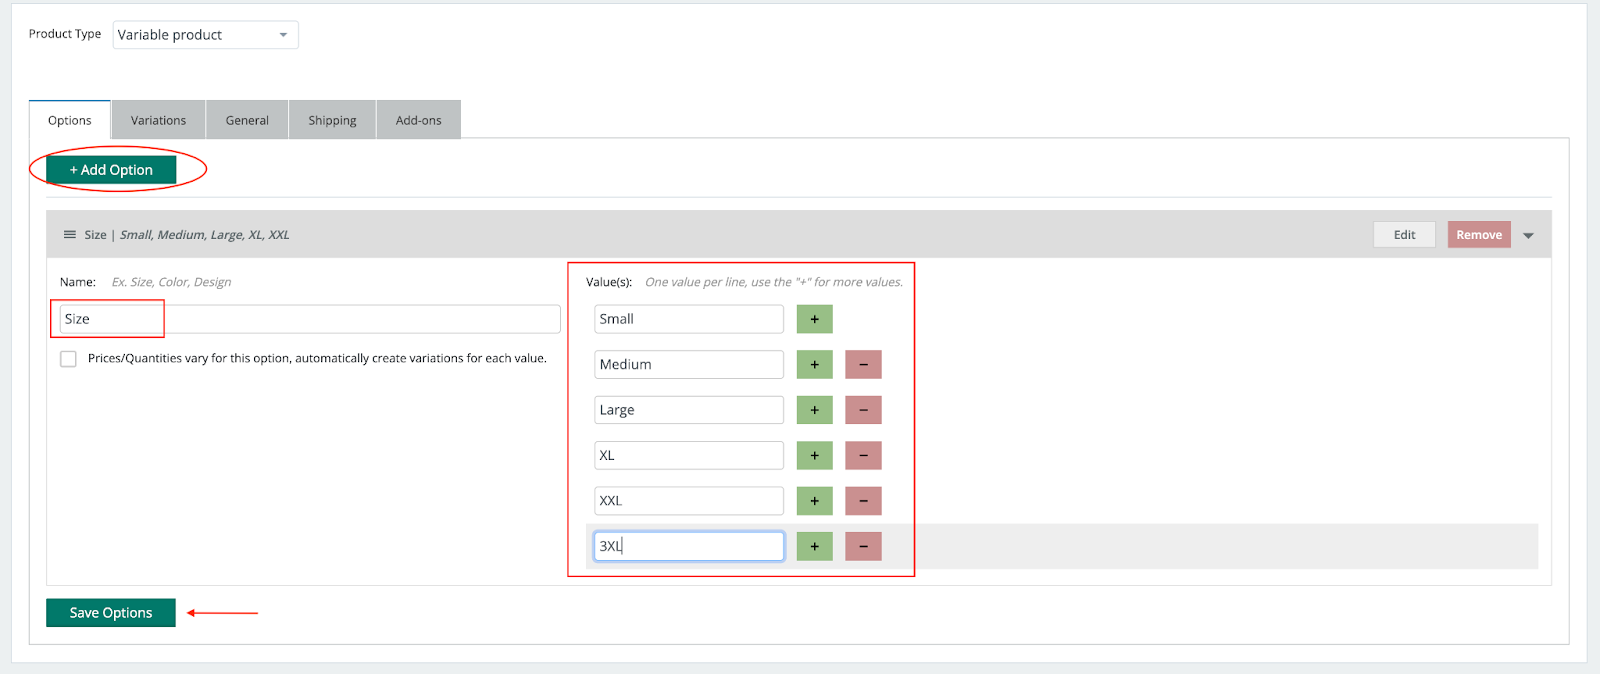
***Be sure to click the “Save Options” button to save them.
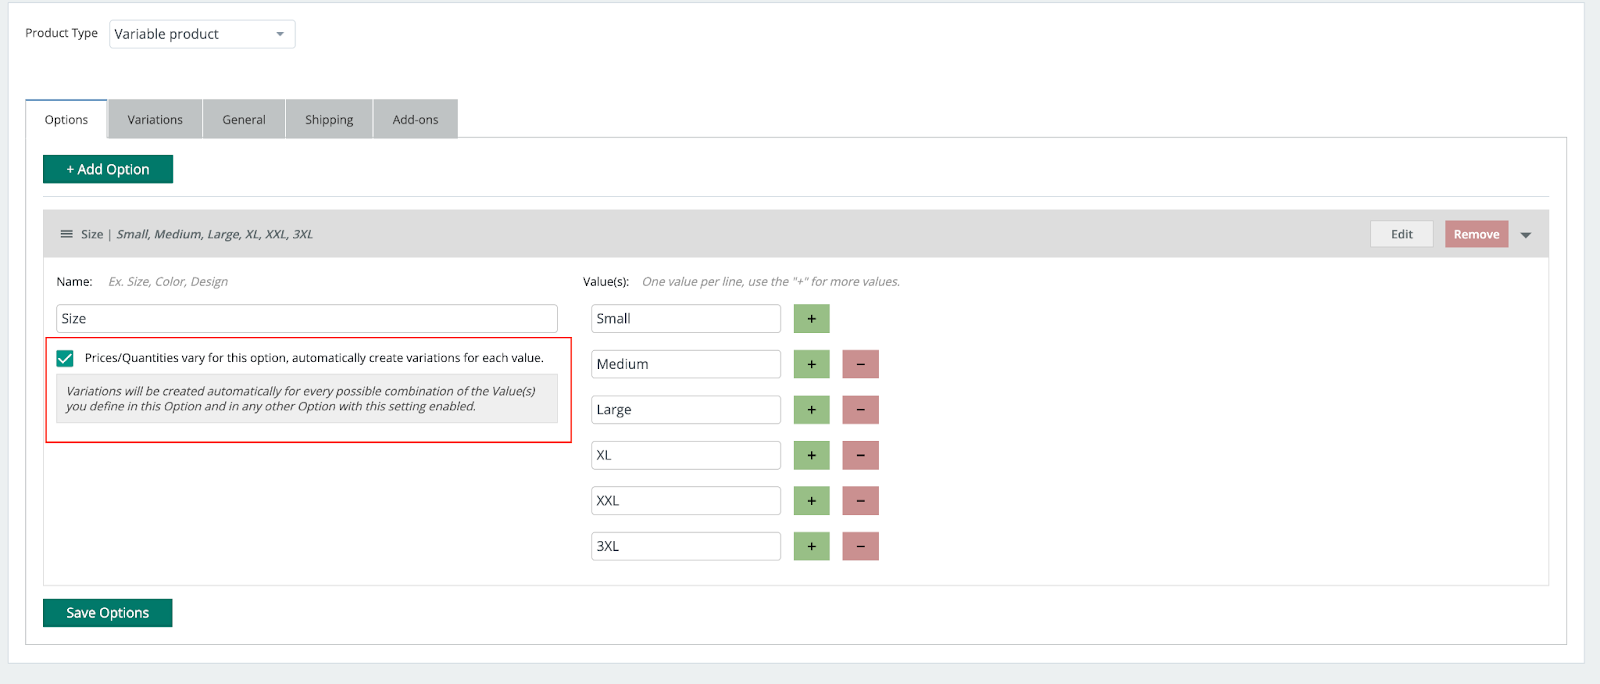
If the price or quantity that you have available varies within that option (Ex. Sizes 2XL & 3XL are priced higher and you have varied stock in each size), you’ll need to select the checkbox “Prices/Quantities vary…”
Add additional Options as needed (Color, etc):
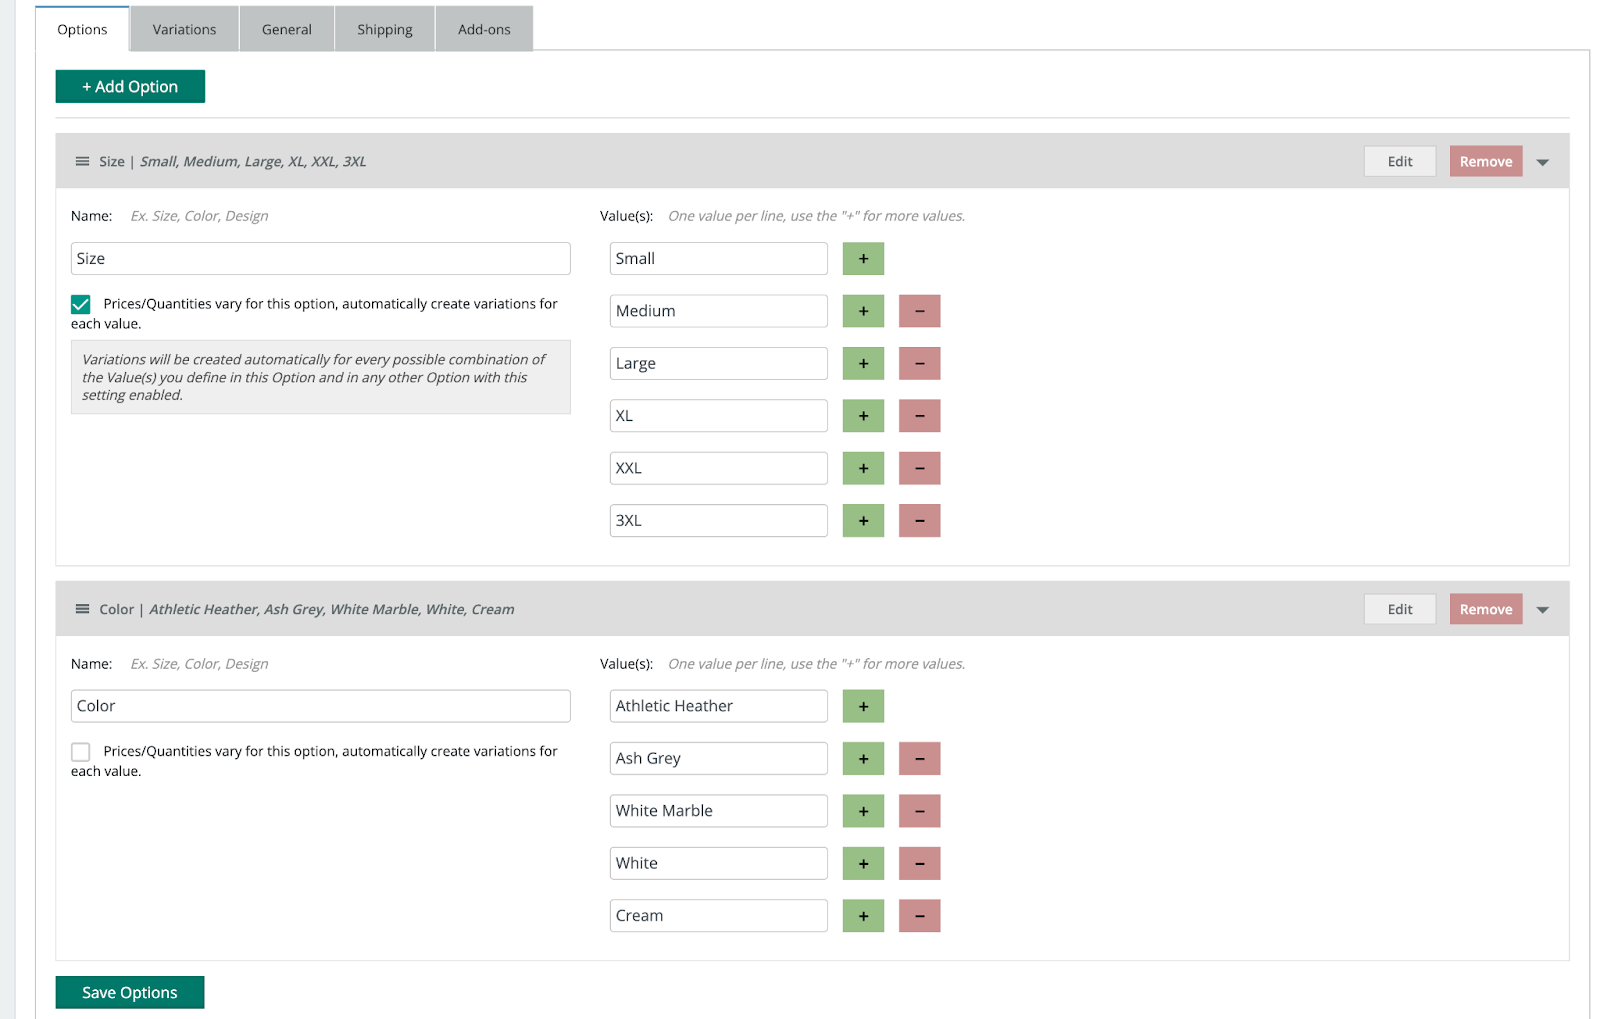
** Again, be sure to click “Save Options” before moving on to the Variations tab.
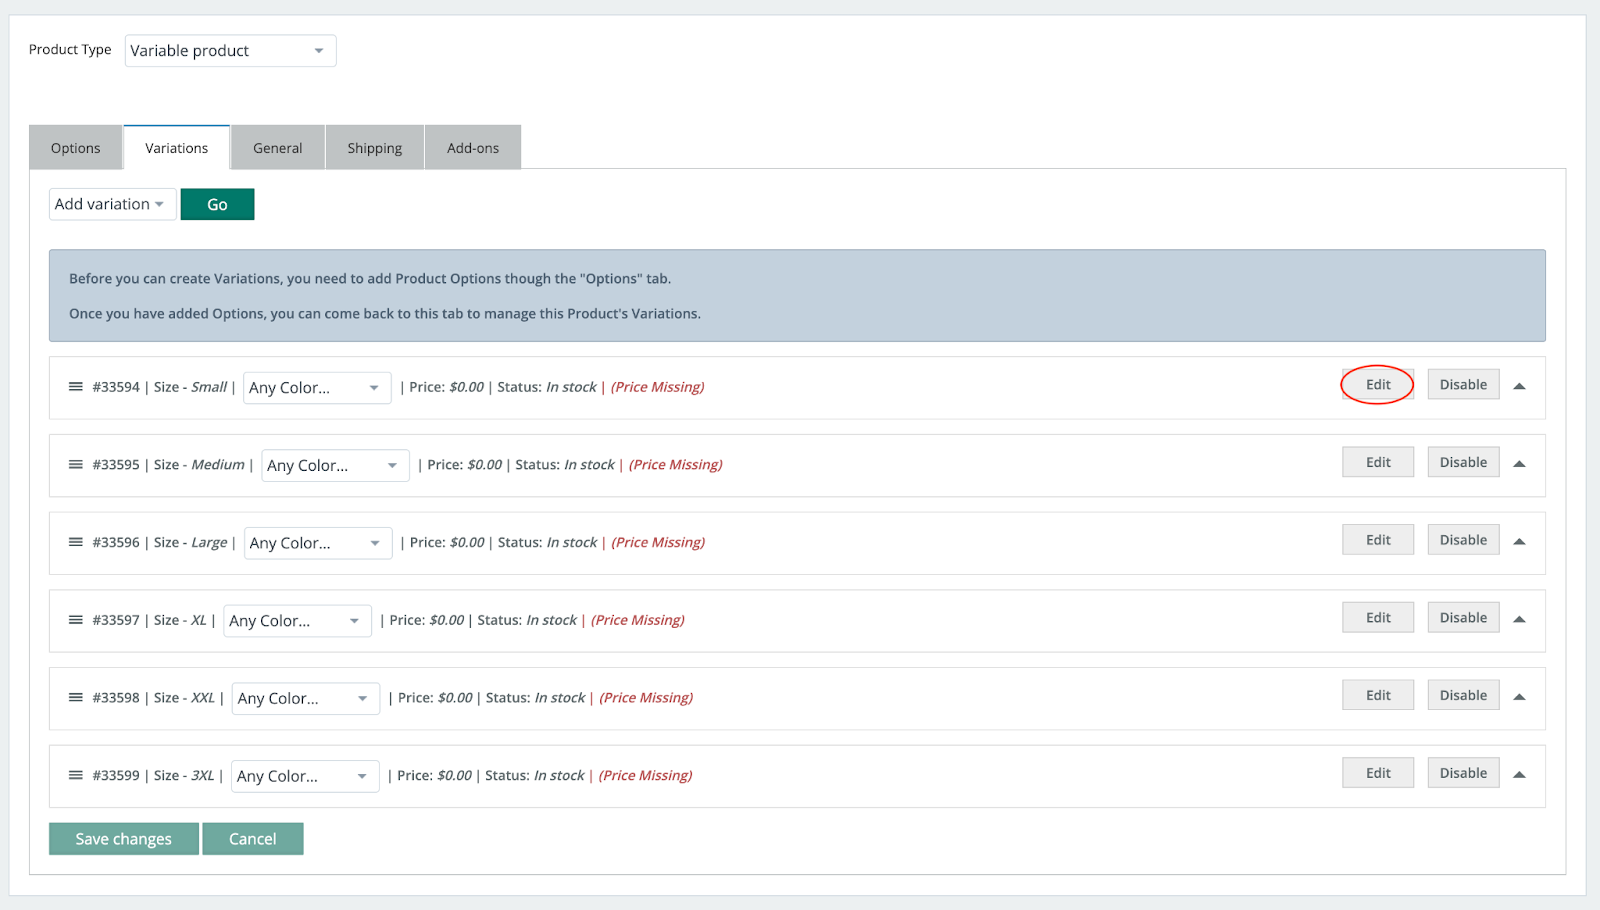
Go to Variations Tab
On the Variations tab, you will add all of the product data for EACH individual product option (eg. size). You’ll select the “Edit” button or click within the bar of each option to add the necessary information. Price is required for each value in order for that option to be visible to customers.
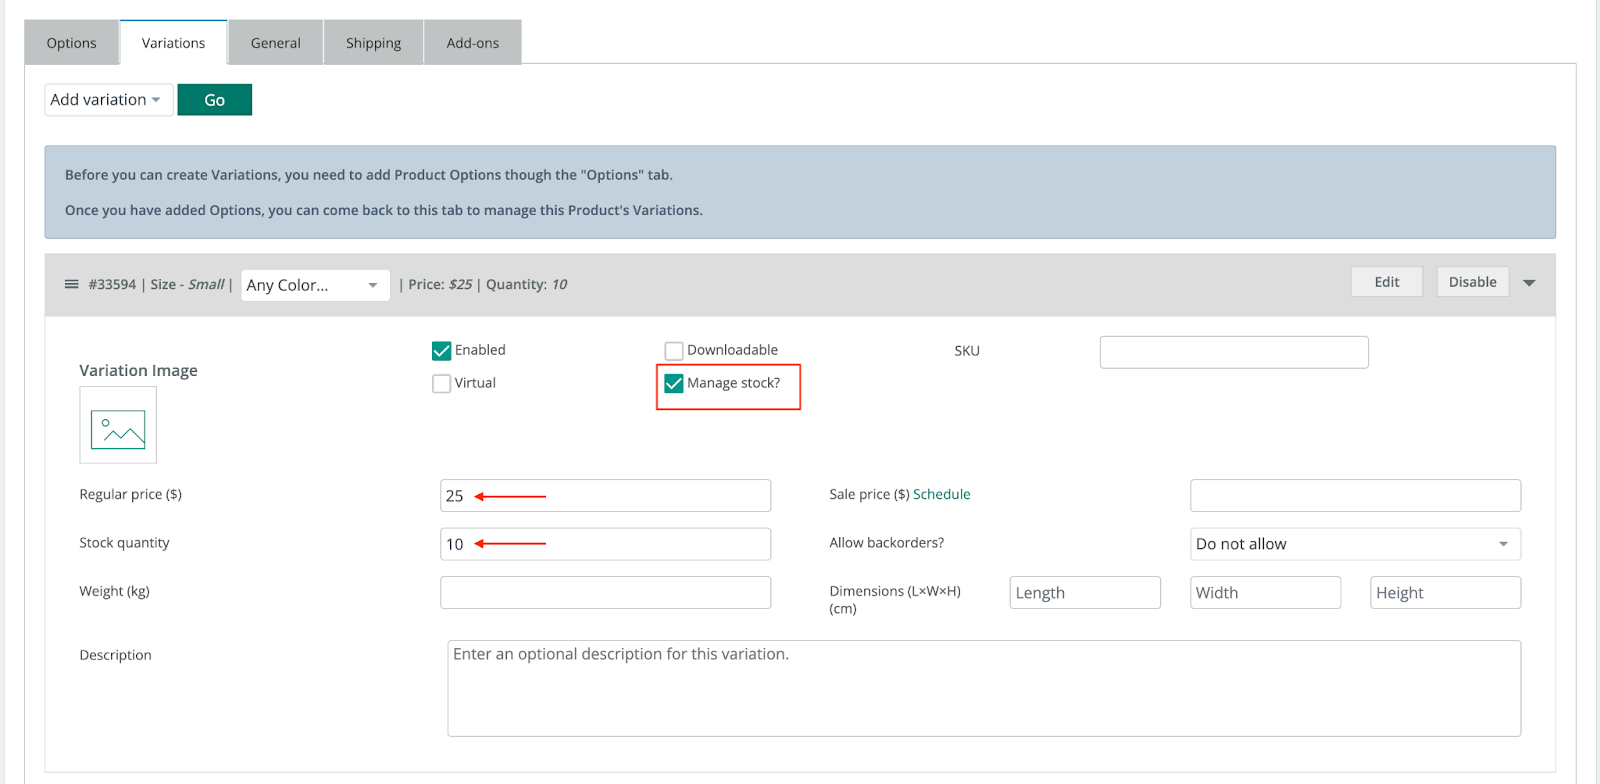
Once expanded, you’ll enter the price (or sale price). You also have the option to “Manage Stock” and enter the stock quantity available, add an image of that specific option, enter a short description of that option, etc.
Click the “Save changes” button to save your adjustments to each of your Variations.
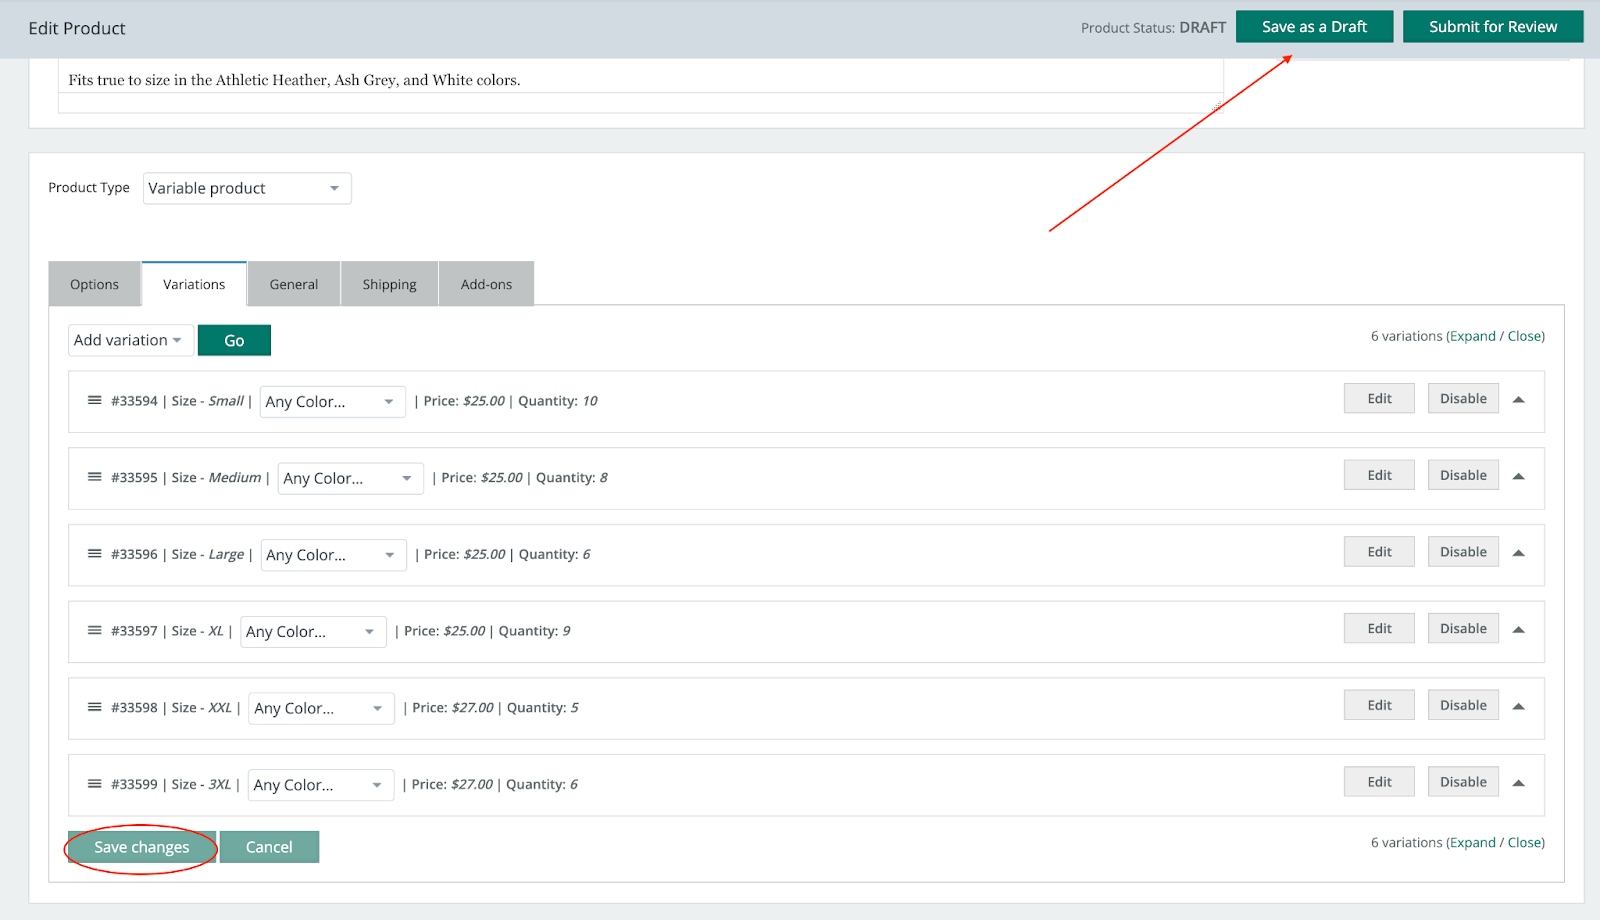
Save as a Draft
Similar to Simple Products, you’ll want to click the “Save as a Draft” button (see above) to save your progress. Clicking this button will save and put the product into the Draft status, and will not show the product on the website.
Any changes you make WILL NOT be auto-saved as you’re working. You must click the Draft button to save, as the system must be sure that you want to officially change the content/status of that product.
If you have a published product and you click Draft, the product will not display on the site until you Submit for review.
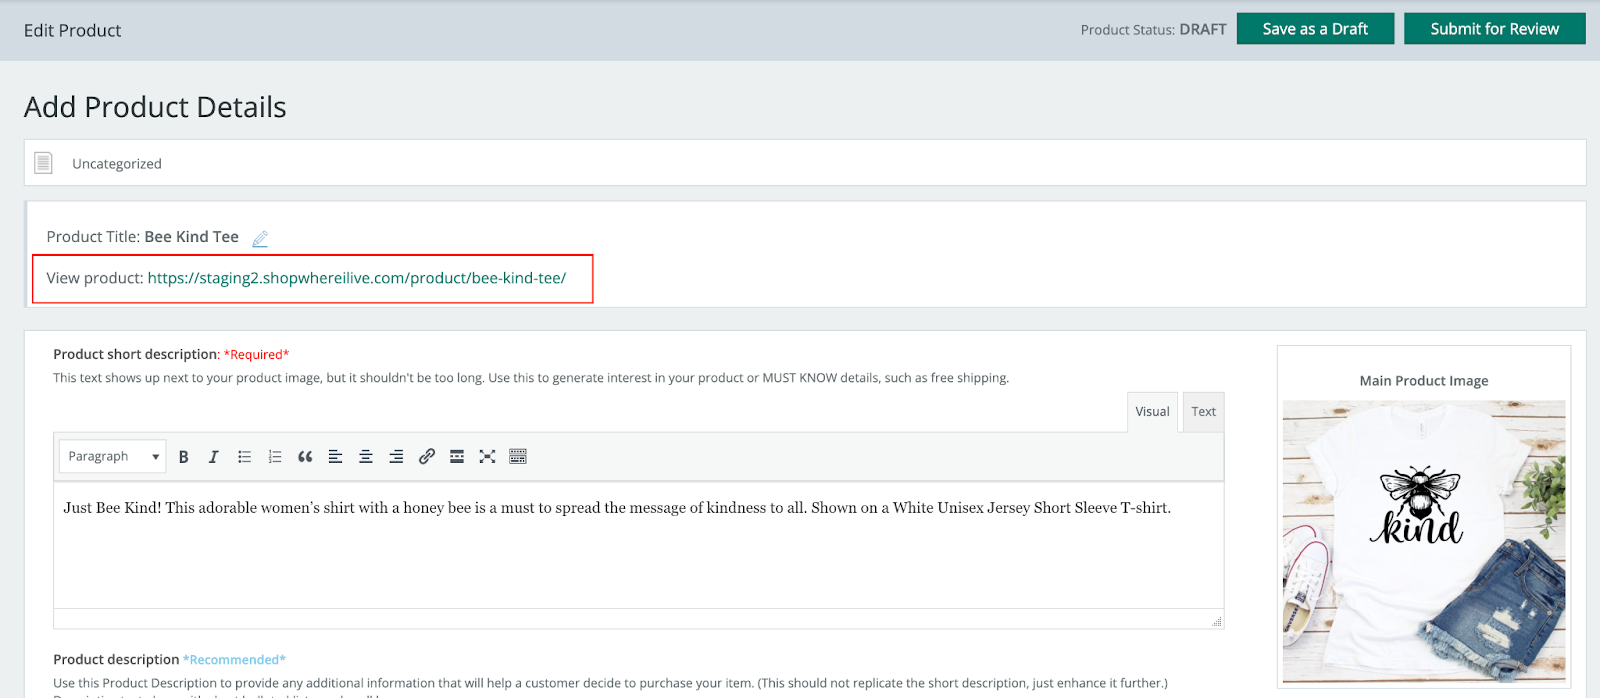
Preview Your Product
If you want to see a preview of what your product will look like to a customer, please click “Save as a Draft”, then click the “View Product” link at the top of the product page, just below the Product Title.
Submit for Review
Please note that any new products, or changes to existing products, must be submitted to be reviewed by our team to assure it’s set up properly for purchase. Review is typically done within 1 business day. If submitted on the weekend or during a holiday, it may be delayed.
The Status column on the Products page of your Seller Dashboard tells you where in the process your product is in.